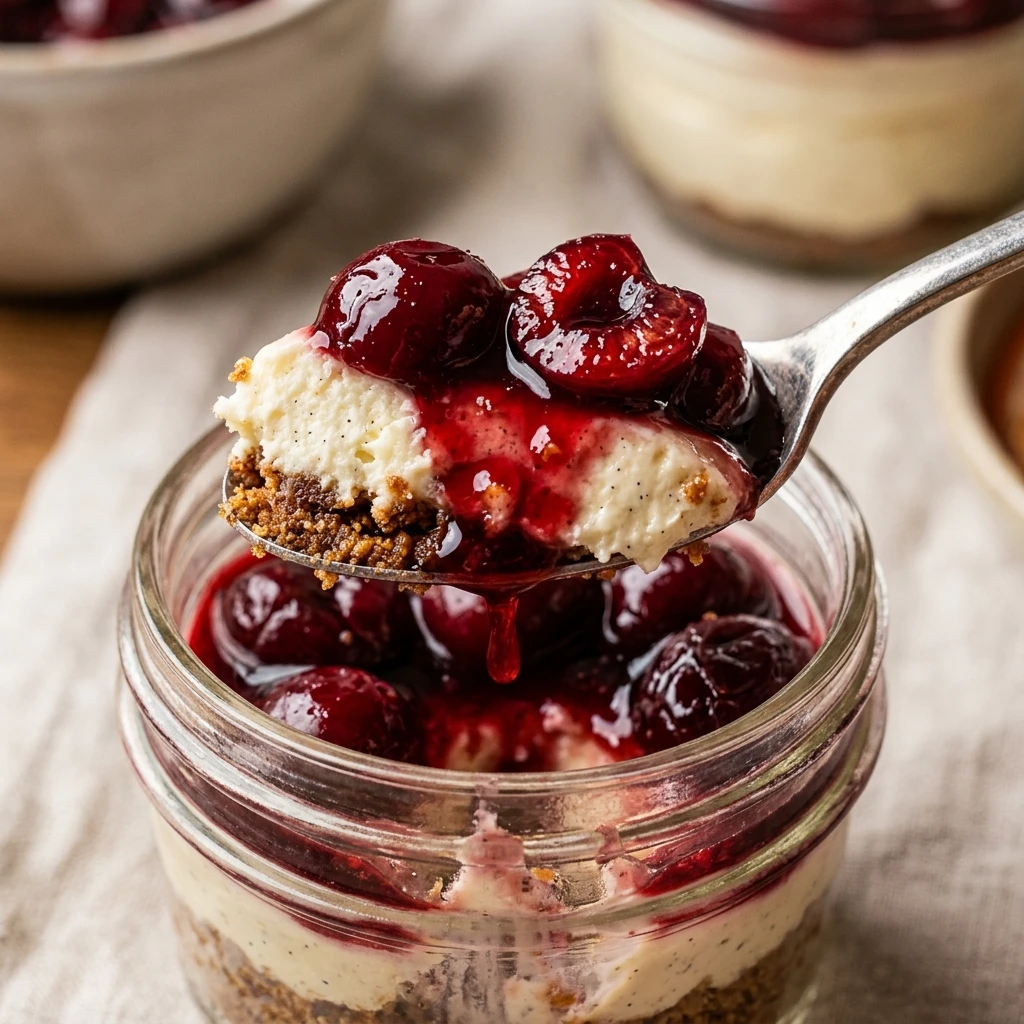

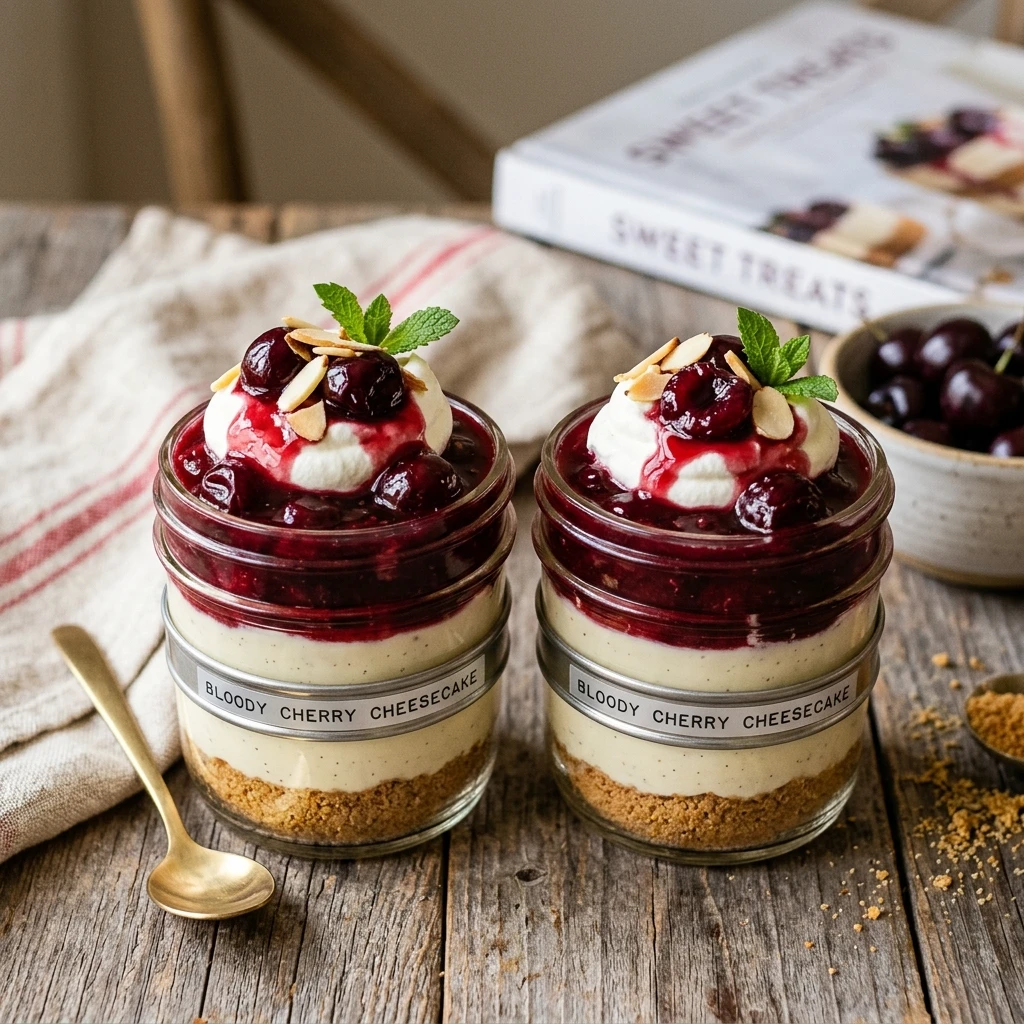
These Bloody Cherry Cheesecake Jars are the ultimate spooky treat for your next Halloween party or horror-themed gathering. They combine a buttery graham cracker crust with a rich, velvety cheesecake filling and a vibrant, “bloody” cherry topping that looks macabre but tastes divine. Serving these in individual jars makes them portable, mess-free, and perfectly portioned for every guest.
The contrast between the deep red cherry sauce and the snowy white cheesecake layer creates a striking visual effect that is sure to be the center of attention. Whether you are hosting a festive bash or just want a fun weekend project with the kids, this no-bake recipe is a guaranteed winner that balances tartness and sweetness in every bite.
Recipe Information
- Prep Time: 20 minutes
- Cook Time: 5 minutes
- Total Time: 25 minutes
- Servings: 4 jars
- Difficulty Level: Easy
Nutrition Information
- Calories per serving: 385 kcal
- Protein: 5g
- Carbohydrates: 44g
- Fat: 22g
- Fiber: 1g
- Sugar: 31g
- Sodium: 215mg
Why Make This Bloody Cherry Cheesecake Jars Recipe
One of the best reasons to make this recipe is that it requires absolutely no baking. This saves you time and keeps your kitchen cool, making it a stress-free dessert option. The individual jars allow for easy customization and make for a beautiful presentation that looks like it came straight from a professional bakery or a spooky movie set.
Additionally, this recipe is highly adaptable. While it is themed for Halloween, you can easily tweak the decorations to suit any occasion. The combination of creamy cheese and tart cherries is a classic flavor profile that appeals to both children and adults alike. It is a fantastic way to enjoy the indulgence of a full-sized cheesecake without the complexity of water baths or cracking crusts.
How to Make Bloody Cherry Cheesecake Jars Recipe
Creating these delightful jars is a simple process of layering flavors and textures. Follow these easy steps to build a dessert that is as delicious as it is visually impressive.
Ingredients
- 1 cup graham cracker crumbs
- 3 tablespoons unsalted butter, melted
- 1 package (8 oz) cream cheese, softened to room temperature
- 1/2 cup powdered sugar
- 1 teaspoon vanilla extract
- 1 cup heavy whipping cream (or pre-made whipped topping)
- 1 can (21 oz) cherry pie filling
- 2-3 drops red food coloring (optional, for a deeper “blood” look)
- Optional: Plastic “knives” or sugar glass for decoration
Directions
Step 1: Prepare the Crust Base
In a small mixing bowl, combine the graham cracker crumbs and the melted butter. Stir them together until the crumbs are evenly moistened and resemble wet sand. Spoon the mixture into the bottom of four small glass jars and press down lightly with a spoon to create an even base.
Step 2: Beat the Cream Cheese
In a large mixing bowl, beat the softened cream cheese, powdered sugar, and vanilla extract together using a hand mixer or stand mixer. Continue mixing on medium speed until the mixture is completely smooth and free of any lumps.
Step 3: Fold in the Whipped Cream
If using heavy cream, whip it in a separate bowl until stiff peaks form. Gently fold the whipped cream (or store-bought whipped topping) into the cream cheese mixture using a spatula. Be careful not to over-mix, as you want to keep the filling light and airy.
Step 4: Layer the Cheesecake Filling
Pipe or spoon the cheesecake mixture into the jars on top of the graham cracker crust. Smooth the tops with a small spatula or the back of a spoon, leaving enough room at the top for the cherry layer. For the best texture, refrigerate the jars for at least 30 minutes to let the filling set.
Step 5: Prepare and Add the “Bloody” Topping
Empty the cherry pie filling into a bowl. If you want a more “gory” appearance, add a few drops of red food coloring to make the syrup look darker and more liquid. Spoon the cherry mixture generously over the cheesecake layer. Let some of the syrup drip down the sides of the glass for a more dramatic effect.
How to Serve Bloody Cherry Cheesecake Jars Recipe
Serve these jars chilled directly from the refrigerator. For a truly spooky presentation, you can place a small plastic toy knife or a shard of edible “sugar glass” into the center of the cherry topping. Wiping a little bit of the cherry syrup around the rim of the jar can also enhance the “bloody” look. Provide long dessert spoons so guests can reach every delicious layer.
How to Store Bloody Cherry Cheesecake Jars Recipe
These cheesecake jars can be stored in the refrigerator for up to 3 days. If your jars have lids, seal them tightly to keep the cheesecake fresh and prevent it from absorbing other fridge odors. If they don’t have lids, a tight layer of plastic wrap will work perfectly. It is not recommended to freeze these, as the texture of the cream cheese and cherries may change upon thawing.
Expert Tips for Perfect Bloody Cherry Cheesecake Jars Recipe
To ensure the best results, always use full-fat cream cheese and make sure it is completely at room temperature before mixing; this prevents a grainy texture. If you want the “blood” to look even more realistic, you can mix a tiny drop of blue food coloring into the red to create a deeper, vein-like crimson color. For a cleaner look when filling the jars, use a piping bag with a large round tip to dispense the cheesecake mixture.
Delicious Variations
You can easily switch up the flavors by using Oreo cookie crumbs instead of graham crackers for a “dirt” and “blood” aesthetic. If you aren’t a fan of cherry, raspberry or strawberry pie filling works just as well and maintains the red color. For an adult twist, stir a tablespoon of cherry brandy or bourbon into the fruit filling before topping the jars.
Frequently Asked Questions
Q: Can I make this recipe in a large dish instead of jars?
Yes, you can follow the same steps to create a single large no-bake cheesecake in an 8×8 inch pan or a glass trifle bowl.
Q: Is there a substitute for heavy whipping cream?
You can use an equal amount of store-bought whipped topping (like Cool Whip) for a more stable and convenient alternative.
Q: How do I make the crust crunchier?
If you prefer a crunchier base, you can bake the crust-filled jars at 350°F for about 5 minutes, then let them cool completely before adding the cheesecake layer.
Q: Can I use fresh cherries?
Yes, but you will need to cook them down with sugar and a cornstarch slurry to create a thick, sauce-like consistency similar to pie filling.
Q: How long can these sit out at a party?
Because they contain dairy, it is best not to leave them out for more than 2 hours. Keep them on ice if they need to be out longer.
Conclusion
The Bloody Cherry Cheesecake Jars Recipe is the perfect blend of spooky aesthetics and delicious flavor. Easy to make and even easier to eat, these jars are a fantastic addition to any festive menu. With their creamy filling and “bloody” fruit topping, they offer a fun and memorable way to celebrate the season with friends and family. Enjoy your creepy-crawly dessert!
Bloody Cherry Cheesecake Jars Recipe
- Total Time: 25 minutes
Ingredients
- 1 cup graham cracker crumbs
- 3 tablespoons unsalted butter, melted
- 1 package (8 oz) cream cheese, softened to room temperature
- 1/2 cup powdered sugar
- 1 teaspoon vanilla extract
- 1 cup heavy whipping cream (or pre-made whipped topping)
- 1 can (21 oz) cherry pie filling
- 2–3 drops red food coloring (optional, for a deeper “blood” look)
- Optional: Plastic “knives” or sugar glass for decoration
Instructions
- In a small mixing bowl, combine the graham cracker crumbs and the melted butter. Stir them together until the crumbs are evenly moistened and resemble wet sand. Spoon the mixture into the bottom of four small glass jars and press down lightly with a spoon to create an even base.
- In a large mixing bowl, beat the softened cream cheese, powdered sugar, and vanilla extract together using a hand mixer or stand mixer. Continue mixing on medium speed until the mixture is completely smooth and free of any lumps.
- If using heavy cream, whip it in a separate bowl until stiff peaks form. Gently fold the whipped cream (or store-bought whipped topping) into the cream cheese mixture using a spatula. Be careful not to over-mix, as you want to keep the filling light and airy.
- Pipe or spoon the cheesecake mixture into the jars on top of the graham cracker crust. Smooth the tops with a small spatula or the back of a spoon, leaving enough room at the top for the cherry layer. For the best texture, refrigerate the jars for at least 30 minutes to let the filling set.
- Empty the cherry pie filling into a bowl. If you want a more “gory” appearance, add a few drops of red food coloring to make the syrup look darker and more liquid. Spoon the cherry mixture generously over the cheesecake layer. Let some of the syrup drip down the sides of the glass for a more dramatic effect.
- Cook Time: 25 minutes
- Diet: Vegetarian